Are you tired of weather-dependent golf practice? Imagine stepping into your garage, basement, or spare room and teeing off whenever the mood strikes – regardless of rain, snow, or darkness outside. This dream becomes reality with a quality golf simulator enclosure.
✨Was this helpful? Spread the word!
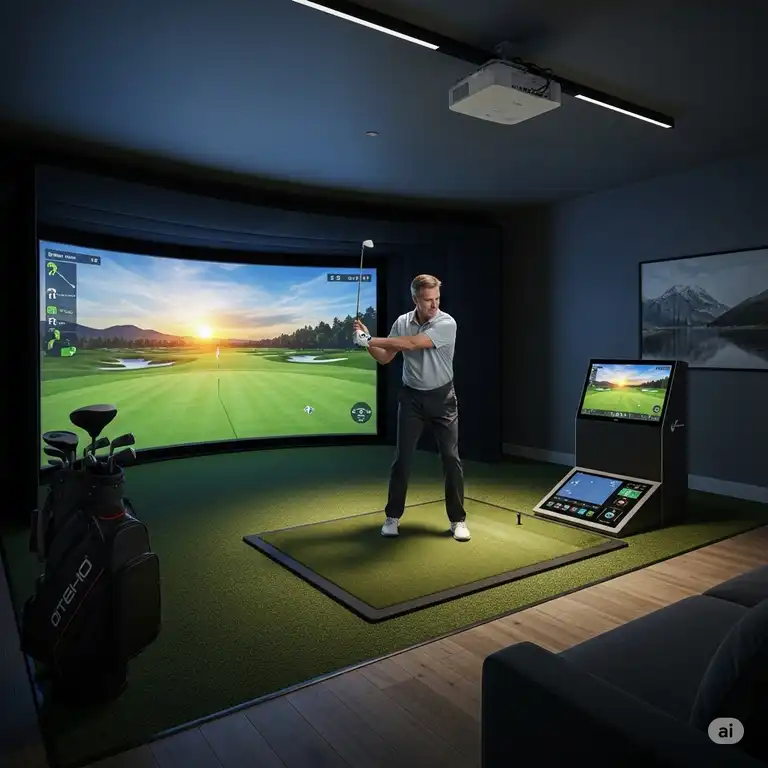
A golf simulator enclosure forms the physical framework that transforms an ordinary space into your personal golf sanctuary. It’s the protective cocoon that catches your powerful drives, houses your simulation technology, and creates an immersive golfing experience right at home.
As an avid golfer who’s spent countless hours researching and testing various home golf setups, I’m excited to guide you through everything you need to know about golf simulator enclosures. From basic DIY options to professional-grade installations, this comprehensive guide will help you make an informed decision.
Comparing Golf Simulator Enclosures with Alternatives
Before diving deeper, let’s compare golf simulator enclosures with other practice options:
| Feature | Golf Simulator Enclosure | Golf Net | Outdoor Practice | Commercial Simulator |
|---|---|---|---|---|
| Weather Independence | ✅ Complete protection | ✅ Partial protection | ❌ Weather dependent | ✅ Complete protection |
| Ball Flight Data | ✅ Full metrics possible | ❌ Limited feedback | ❌ Visual only | ✅ Full metrics |
| Course Simulation | ✅ Possible with proper setup | ❌ Not possible | ❌ Not possible | ✅ High-quality simulation |
| Space Required | Medium-Large (10’×10’×8′ min) | Small-Medium | Large outdoor area | None (pay per session) |
| Initial Cost | $500-$5,000+ | $50-$500 | $0-$100 | $0 upfront |
| Long-term Cost | One-time purchase | Occasional replacement | Range fees, travel | Ongoing session fees |
| Skill Improvement | ✅ Comprehensive feedback | Limited feedback | No immediate feedback | ✅ Comprehensive feedback |

What Is a Golf Simulator Enclosure?
A golf simulator enclosure is a structural framework with impact-resistant materials designed to contain golf balls hit within an indoor space. It typically consists of a metal or PVC frame, side netting or panels, and a high-quality impact screen where you hit your golf balls and view projected images of golf courses.
The enclosure serves several critical functions:
- Safety: Prevents errant shots from damaging your walls, furniture, or electronics
- Ball Containment: Captures balls after impact for convenient retrieval
- Projection Surface: Houses the impact screen where course visuals are displayed
- Equipment Protection: Shields expensive launch monitors and projectors
- Immersion: Creates a dedicated space that enhances the simulation experience
A complete golf simulator setup typically includes:
- The enclosure framework
- Impact screen
- Side and top netting
- Projector (ceiling or floor-mounted)
- Launch monitor (tracks ball and club data)
- Simulation software
- Computer or tablet to run the software
- Golf mat
However, this article focuses specifically on the enclosure component – the physical structure that makes everything else possible.
Types of Golf Simulator Enclosures
When exploring options for your home setup, you’ll encounter several distinct types of golf simulator enclosure configurations. Each has unique advantages depending on your space, budget, and goals.
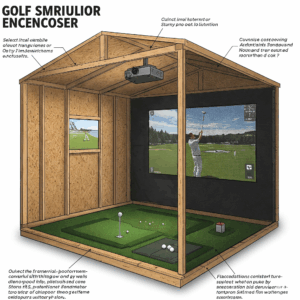
1. DIY Golf Simulator Enclosures
Many golf enthusiasts start their indoor simulation journey by creating DIY enclosures. These custom-built solutions can range from basic PVC frames with netting to more elaborate wooden constructions.
Pros of DIY Enclosures:
- Cost-effective (typically $200-$800 in materials)
- Customizable to your exact space dimensions
- Opportunity to build exactly what you want
- Pride of craftsmanship
Cons of DIY Enclosures:
- Time-intensive (plan for 1-3 days of work)
- Requires basic construction skills
- May lack professional aesthetics
- Potentially less durable than commercial options
According to a survey by Golf Digest, approximately 35% of home golf simulator users began with a DIY enclosure before upgrading to commercial options.
2. Prefabricated Golf Simulator Enclosure Kits
For those seeking convenience without sacrificing quality, prefabricated kits offer a compelling middle ground. These complete packages include frames, impact screens, and side netting designed to work together seamlessly.
Popular Golf Simulator Enclosure Kit Sizes:
- Standard: 10′ width × 8′ height × 5′ depth (minimum recommended)
- Premium: 12′ width × 9′ height × 6′ depth (ideal for most users)
- Professional: 16’+ width × 10’+ height × 8’+ depth (for commercial settings)
The right size depends on your available space, ceiling height, and swing characteristics. Taller golfers or those with particularly aggressive swings may need extra height and depth.
3. Permanent vs. Retractable Enclosures
Another consideration is whether you need a permanent installation or a retractable solution.
Permanent Enclosures:
- Maximum stability and durability
- Professional appearance
- No setup/breakdown time
- Requires dedicated space
Retractable Enclosures:
- Can be folded away when not in use
- Allows dual-purpose room usage
- Generally more affordable
- Quicker installation
- Less robust during use
According to the National Golf Foundation, approximately 75% of home simulator users prefer permanent enclosures when space allows, citing convenience and stability as primary factors.
Key Features to Look For in Golf Simulator Enclosures
Not all golf simulator enclosures are created equal. The following factors significantly impact performance, durability, and overall satisfaction:

1. Frame Construction Materials
The enclosure frame provides structural integrity and determines how securely your impact screen and netting will be held in place.
Common Frame Materials:
- PVC Pipe: Affordable, lightweight, easy to modify, but less durable
- Aluminum: Excellent strength-to-weight ratio, rust-resistant, moderately priced
- Steel: Maximum durability, highest stability, but heavier and more expensive
For serious golfers who plan to use their simulator frequently, investing in a metal frame system will prove worthwhile in the long run.
2. Impact Screen Quality
The impact screen is arguably the most critical component of your enclosure, as it must:
- Withstand thousands of ball impacts
- Provide a clear projection surface
- Minimize bounce-back
- Produce minimal noise upon impact
Premium impact screens feature multiple layers of specialized materials designed specifically for golf simulation. Look for screens with:
- Minimum 1-year warranty
- Multi-layer construction
- Ball speed ratings of 200+ mph
- Even tension mounting systems
- Minimal screen “bounce” upon impact
A study by MyGolfSpy found that high-quality impact screens maintain their integrity for approximately 10,000-30,000 hits before showing signs of wear, while budget options may begin deteriorating after just 1,000-5,000 impacts.
3. Side and Top Containment
While the impact screen catches most shots, you’ll need reliable side and ceiling protection to contain mishits, topped shots, and ricochets.
Containment Options:
- Nylon Netting: Affordable, lightweight, easy to install
- Polyester Mesh: Greater durability, moderate cost
- Solid Side Panels: Maximum containment, professional appearance, highest cost
The ideal solution depends on your space and typical shot patterns. Slicers and hookers may want complete side coverage, while consistent strikers might need less protection.
4. Mounting Systems and Tensioning
How your impact screen attaches to the frame significantly affects performance and longevity.
Superior mounting systems feature:
- Even tension distribution across the screen
- Easy screen replacement capability
- Minimal wrinkles or sagging
- Secure attachments that won’t loosen over time
Look for enclosures with grommets, bungee systems, or dedicated tensioning hardware rather than simple ties or hooks.
Comparison of Leading Golf Simulator Enclosure Models
When evaluating different enclosure models, consider these key performance attributes:
| Enclosure Feature | Entry-Level | Mid-Range | Professional-Grade |
|---|---|---|---|
| Frame Material | PVC or light aluminum | Heavy-duty aluminum | Steel or commercial aluminum |
| Impact Screen | Single-layer polyester | Dual-layer with coating | Multi-layer with dampening |
| Expected Lifespan | 1-3 years | 3-5 years | 5+ years |
| Installation Difficulty | DIY-friendly (2-4 hours) | Moderate (4-6 hours) | Complex (professional recommended) |
| Side Protection | Basic netting | Premium netting/partial panels | Full side panels |
| Ball Containment | Good (90% of shots) | Very Good (95% of shots) | Excellent (99%+ containment) |
| Screen Tensioning | Basic ties or velcro | Bungee system | Advanced tensioning hardware |
| Typical Price Range | $500-$1,000 | $1,000-$2,500 | $2,500-$7,000+ |
| Warranty | 1 year limited | 2-3 years | 5+ years comprehensive |
Benefits of Installing a Golf Simulator Enclosure
Investing in a quality golf simulator enclosure delivers numerous advantages beyond just weather-independent practice.
1. Year-Round Practice Opportunity
Perhaps the most obvious benefit is the ability to maintain your skills regardless of season or weather conditions. According to research published in the Journal of Sports Sciences, golfers who maintain consistent practice throughout winter months retain significantly more skill proficiency than those who take extended breaks.
2. Accelerated Skill Development
The immediate feedback loop created by a simulator environment can dramatically accelerate improvement. When you can hit 100 balls in an hour while receiving instant data on each swing, pattern recognition and correction happen much faster than on the range.
The PGA Teaching and Coaching Summit reports that students using simulator practice in conjunction with traditional instruction improve key metrics 23% faster than those using range practice alone.
3. Convenience and Time Efficiency
A home golf simulator enclosure eliminates travel time, waiting for tee times, or working around facility operating hours. This convenience translates to more frequent practice sessions, which naturally leads to faster improvement.
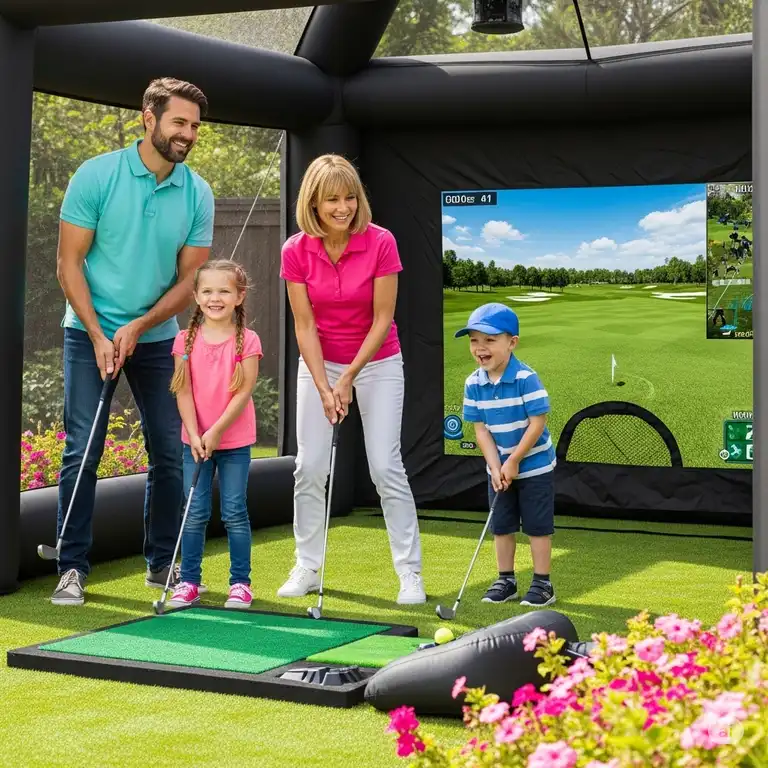
4. Entertainment and Social Value
Beyond serious practice, a golf simulator enclosure creates entertainment opportunities for family and friends. Virtual competitions, course play, and skill challenges make for engaging social activities regardless of participants’ skill levels.
5. Data-Driven Improvement
When paired with modern launch monitors, a simulator enclosure creates the perfect environment for detailed performance analysis. Tracking metrics like:
- Club path and face angle
- Attack angle
- Spin rates
- Carry distances
- Dispersion patterns
This data-rich environment allows for targeted practice and measurable progress tracking.
Comparing Golf Simulator Benefits with Traditional Practice
| Benefit | Golf Simulator Enclosure | Driving Range | On-Course Practice |
|---|---|---|---|
| Weather Independence | ✅ Complete | ❌ Limited (covered ranges) | ❌ Weather dependent |
| Time Efficiency | ✅ High (no travel) | Moderate | ❌ Low (travel + waiting) |
| Shot Feedback | ✅ Immediate and detailed | Visual only | Results only |
| Convenience | ✅ 24/7 accessibility | Operating hours | Tee time required |
| Cost Per Shot | ✅ Very low after initial investment | Moderate ongoing cost | ❌ High (green fees) |
| Game Simulation | ✅ Full course play | ❌ Not possible | ✅ Authentic experience |
| Data Collection | ✅ Comprehensive metrics | ❌ Limited unless paying extra | ❌ Limited |
| Social Enjoyment | ✅ Multiple players, games | Limited interaction | ✅ Full social experience |
How to Choose the Right Golf Simulator Enclosure
Selecting the optimal golf simulator enclosure requires considering several key factors specific to your situation:
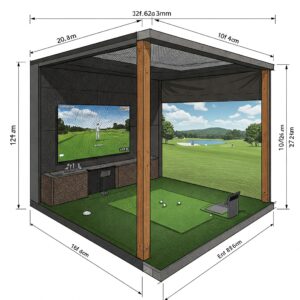
1. Space Assessment
Begin with an honest evaluation of your available space. Minimum recommended dimensions for comfortable simulator use are:
- Width: At least 10 feet (12+ feet ideal)
- Depth: At least 12 feet from screen to hitting position (15+ feet ideal)
- Height: Minimum 8.5 feet (9+ feet ideal)
- Total Area: 120+ square feet
Remember to account for:
- Your height and swing arc
- Club length (drivers require more space than irons)
- Ventilation needs
- Access points
- Equipment storage
2. Budget Considerations
Golf simulator enclosures vary dramatically in price based on size, materials, and features. Establish a realistic budget by category:
Budget Options ($500-$1,000):
- DIY frames with basic netting
- Entry-level prefabricated kits
- Minimal side protection
- Basic impact screens
Mid-Range Options ($1,000-$2,500):
- Premium prefabricated kits
- Quality impact screens with decent warranties
- Full side and ceiling protection
- Proper tensioning systems
Premium Options ($2,500-$7,000+):
- Commercial-grade materials
- Professional installation
- Maximum durability
- Enhanced aesthetics
- Comprehensive warranties
Remember that the enclosure is just one component of a complete simulator setup. Reserve appropriate budget for your launch monitor, projector, and software.
3. Compatibility with Other Components
Ensure your chosen enclosure works seamlessly with other simulation equipment:
- Projector Placement: Does the enclosure allow for optimal projector positioning?
- Launch Monitor Integration: Is there appropriate space and mounting for your tracking technology?
- Software Requirements: Will your chosen software work with your screen dimensions?
- Hitting Surface: Will your golf mat fit properly within the enclosure?
According to a survey by Golf Monthly, 65% of simulator owners cited component compatibility issues as their biggest regret when purchasing independently rather than as a complete system.
4. Installation Complexity
Be realistic about your DIY capabilities and available help:
- DIY Installation: Most prefabricated kits require 2-4 hours and basic tools
- Semi-DIY: Some complex systems may require specialized tools or multiple people
- Professional Installation: Full service install typically costs $500-$1,500 depending on complexity
5. Future-Proofing
Consider how your needs might evolve:
- Will you want to upgrade components later?
- Might you relocate the simulator to a different space?
- Do you plan to integrate additional technologies in the future?
Choose an enclosure system that allows for modification, expansion, and component upgrades whenever possible.

Setting Up Your Golf Simulator Enclosure
Once you’ve selected your golf simulator enclosure, proper setup is crucial for optimal performance and longevity.
1. Room Preparation
Before assembly begins:
- Clear the installation area completely
- Ensure floor is level and stable
- Check ceiling height throughout the space
- Identify and avoid potential obstructions (pipes, vents, fixtures)
- Plan electrical outlet access for equipment
- Consider sound dampening needs
- Ensure adequate lighting
2. Assembly Tips
For smooth installation:
- Carefully inventory all components before starting
- Read instructions completely before beginning
- Gather required tools in advance
- Recruit help for managing large pieces
- Install frame completely before adding impact screen
- Ensure perfect square alignment of frame (measure diagonals)
- Follow tensioning guidelines precisely for impact screen
- Test all connections before first use
3. Lighting Considerations
Proper lighting dramatically affects simulation quality:
- Ambient Room Lighting: Should be moderate and non-glaring
- Projector Placement: Position to minimize shadows from the golfer
- Screen Illumination: Even lighting across the entire impact screen
- Adjustable Options: Consider dimmable lighting for optimal contrast
According to research by simulator professionals, proper lighting can improve image clarity by up to 40% compared to standard room lighting.
4. Equipment Positioning
Strategic positioning of all components ensures the best experience:
- Projector: Typically ceiling-mounted 1-2 feet behind the hitting area
- Launch Monitor: Positioned according to manufacturer specifications (usually behind or beside the hitting area)
- Computer/Tablet: Within reach but protected from errant shots
- Golf Mat: Positioned at the correct distance from impact screen (typically 10-12 feet)
Top Golf Simulator Enclosure Products
After extensive research and testing, these are my top recommendations for golf simulator enclosures across various budget ranges:
Best Overall: SkyTrak HomeCourse Pro Golf Simulator Enclosure
The SkyTrak HomeCourse Pro combines exceptional build quality, ease of installation, and versatility. This retractable enclosure features a durable aluminum frame, premium impact screen, and side barriers that deliver professional-quality performance.
Key Features:
- Retractable design (deploys/stows in under 30 seconds)
- High-definition polyester impact screen
- Lightweight yet durable construction
- Compatible with most launch monitors
- Quick-release mounting system
- Dimensions: 10.5′ width × 8.5′ height × 3.5′ depth
- Price: Around $2,399
Pros:
- Outstanding balance of quality and convenience
- Excellent for multi-purpose rooms
- Simple one-person installation
- Minimal bounce-back on impact
- 2-year comprehensive warranty
Cons:
- Less robust than permanent installations
- Limited side protection compared to full enclosures
- Higher price than basic options
Best Budget Option: Cimarron Sports Complete Golf Simulator Enclosure
For golfers seeking affordability without sacrificing essential quality, the Cimarron Sports Complete Golf Simulator Enclosure delivers impressive value. This kit includes everything needed for a fundamental simulation experience.
Key Features:
- Heavy-duty 1″ steel frame
- High-impact polyester screen
- Side barrier netting
- Easy tension adjustment system
- Dimensions: 10′ width × 8′ height × 5′ depth
- Price: Around $999
Pros:
- Excellent price-to-quality ratio
- Sturdy frame construction
- Simple assembly (approximately 2-3 hours)
- Good ball containment
- Compatible with most projector setups
Cons:
- Basic impact screen (may need upgrading for heavy use)
- Limited size options
- Manual tensioning system requires occasional adjustment
Best Premium Option: Uneekor SwingBay Pro Golf Simulator Enclosure
For those seeking the ultimate home simulator experience, the Uneekor SwingBay Pro represents the gold standard. This professional-grade enclosure features exceptional materials, customization options, and superior performance.
Key Features:
- Commercial-grade aluminum framework
- Triple-layer impact screen with acoustic dampening
- Complete side and ceiling protection panels
- Integrated projector mount
- Premium tensioning system
- Dimensions: Customizable (standard is 14′ width × 9.5′ height × 8′ depth)
- Price: Starting at $4,999
Pros:
- Commercial-quality construction
- Virtually silent ball impact
- Maximum ball containment
- Professional aesthetic
- 5-year comprehensive warranty
- Optional custom branding/graphics
Cons:
- Significant investment
- Complex installation (professional recommended)
- Requires dedicated space
- Longer lead times for delivery
Best for Limited Space: OptiShot Golf-In-A-Box 2 Simulator Enclosure
When space is at a premium, the OptiShot Golf-In-A-Box 2 provides a compact yet functional solution. This cleverly designed enclosure maximizes practice capability while minimizing spatial requirements.
Key Features:
- Compact footprint design
- Lightweight portable frame
- High-density impact screen
- Side barrier nets
- Integrated mat platform
- Dimensions: 8.5′ width × 8′ height × 3.5′ depth
- Price: Around $1,199
Pros:
- Ideal for apartments and small rooms
- Quick setup and breakdown
- All-in-one solution with hitting mat
- Compatible with most basic launch monitors
- Affordable complete package
Cons:
- Limited swing space (not ideal for very tall golfers)
- Basic impact screen quality
- Less immersive experience than larger enclosures
Best DIY-Friendly Option: The Net Return Pro Series Golf Simulator Enclosure
For hands-on golfers who enjoy building their setup, The Net Return Pro Series offers an excellent foundation. This modular system allows for customization while providing quality components and clear instructions.
Key Features:
- Modular tubular frame system
- Commercial-grade impact netting
- Quick-connect assembly design
- Ballistic-grade side barriers
- Auto-return ball feature
- Dimensions: 10′ width × 8′ height × 6′ depth (expandable)
- Price: Around $1,499
Pros:
- Extremely customizable
- No tools required for assembly
- Outstanding durability
- Great customer support
- Expandable over time
Cons:
- Impact screen sold separately
- Less refined appearance than premium options
- Requires some DIY comfort level
Detailed Comparison Table of Recommended Products
| Feature | SkyTrak HomeCourse Pro | Cimarron Sports Complete | Uneekor SwingBay Pro | OptiShot Golf-In-A-Box 2 | The Net Return Pro Series |
|---|---|---|---|---|---|
| Price | $2,399 | $999 | $4,999+ | $1,199 | $1,499 |
| Frame Material | Aluminum | Steel | Commercial Aluminum | Fiberglass Composite | Tubular Metal Alloy |
| Screen Quality | High-Definition Polyester | Standard Polyester | Triple-Layer Premium | High-Density Polyester | Sold Separately |
| Dimensions (W×H×D) | 10.5’×8.5’×3.5′ | 10’×8’×5′ | 14’×9.5’×8′ (customizable) | 8.5’×8’×3.5′ | 10’×8’×6′ (expandable) |
| Installation Time | 30-45 minutes | 2-3 hours | 4-8 hours (pro install recommended) | 1-2 hours | 1-2 hours |
| Portability | Excellent (retractable) | Limited (disassembly required) | Permanent Installation | Good (light components) | Moderate (tool-free breakdown) |
| Warranty | 2 years | 1 year | 5 years | 1 year | 3 years |
| Ball Containment | Good (90%+) | Good (90%+) | Excellent (99%+) | Good for space (85%+) | Very Good (95%+) |
| Durability Rating | 8/10 | 7/10 | 10/10 | 6/10 | 9/10 |
| Best For | Multi-purpose rooms | Budget-conscious buyers | Serious golfers | Small spaces | DIY enthusiasts |
💡 Just one click – help others make better buying decisions too!
✨ Transform Your Game With The Perfect Enclosure! ✨
➡ Ready to elevate your home golf experience? These carefully selected enclosures represent the best options on the market today. Click on any highlighted product to check current pricing and availability. With the right enclosure, you’ll be playing world-class courses from home in no time!

Maintenance and Care for Golf Simulator Enclosures
Proper maintenance significantly extends the life of your simulator enclosure and ensures optimal performance over time.
1. Impact Screen Care
The impact screen endures the most punishment in your simulator setup:
- Regular Inspection: Check weekly for damage, tears, or unusual wear
- Cleaning Schedule: Vacuum dust monthly using a soft brush attachment
- Spot Cleaning: Address ball marks with a damp microfiber cloth
- Deep Cleaning: Use mild soap solution twice yearly (follow manufacturer instructions)
- Even Usage: Vary impact locations to prevent concentrated wear
- Rest Periods: Allow 24 hours between cleaning and next use
A study by simulator manufacturer Foresight Sports found that proper screen maintenance can extend lifespan by up to 40%.
2. Frame and Structure Maintenance
Keep your enclosure framework in top condition:
- Connection Inspection: Check all joints and connections monthly
- Hardware Tightening: Re-tighten any loose screws or bolts immediately
- Lubrication: Apply lubricant to moving parts in retractable systems
- Corrosion Prevention: Wipe down metal components in humid environments
- Structural Assessment: Verify frame alignment quarterly
3. Side Netting and Protection
Don’t neglect the supporting elements:
- Tension Checking: Ensure netting remains properly tensioned
- Repair Small Tears: Address minor damage before it expands
- Cleaning: Remove dust and debris quarterly
- UV Protection: Consider UV-resistant sprays for setups near windows
4. Projector and Technology Care
While not strictly part of the enclosure, adjacent technology benefits from maintenance:
- Projector Filter: Clean monthly to prevent overheating
- Lens Cleaning: Use appropriate lens wipes quarterly
- Cable Management: Secure all wiring away from impact zones
- Component Positioning: Verify optimal alignment seasonally
Troubleshooting Common Issues
Even the best golf simulator enclosures may develop issues over time. Here’s how to address the most frequent problems:
1. Screen Wrinkles and Tension Problems
Wrinkled impact screens affect projection quality and ball response:
Symptoms:
- Visible wrinkles or ripples in screen material
- Uneven ball response on different areas
- Distorted projected image
Solutions:
- Re-tension screen according to manufacturer guidelines
- Use a steamer (on lowest setting) to relax stubborn wrinkles
- Ensure even tension across all attachment points
- Consider professional re-tensioning for persistent issues
2. Ball Containment Failures
When balls escape the enclosure:
Symptoms:
- Balls penetrating side netting
- Ricochets escaping over or around barriers
- Screen failure at impact point
Solutions:
- Inspect and repair any netting tears immediately
- Add secondary containment layers in problem areas
- Verify proper installation and coverage
- Consider upgrading to higher-rated impact materials
3. Frame Stability Issues
Wobbling or unstable enclosures create safety concerns:
Symptoms:
- Visible movement during ball impact
- Creaking or unusual sounds
- Progressive leaning or misalignment
Solutions:
- Verify level installation on floor
- Tighten all connection points
- Add stabilizing weights or anchors where appropriate
- Consider additional bracing for tall enclosures
- Consult manufacturer for structural reinforcement options
4. Projection Quality Problems
When visual quality deteriorates:
Symptoms:
- Faded or discolored projection areas
- Inconsistent brightness across screen
- Poor image clarity
Solutions:
- Clean screen according to manufacturer guidelines
- Adjust projector focus and positioning
- Check for external light sources causing interference
- Verify projector lamp life and brightness settings
- Consider screen replacements for permanent damage
✨ Ready to Transform Your Golf Game? ✨
➡ The perfect golf simulator enclosure is just a click away! Don’t miss this opportunity to revolutionize your practice routine and lower your scores. Browse our top picks now to find the ideal enclosure for your home setup!
Conclusion
A quality golf simulator enclosure transforms an ordinary room into a year-round golf sanctuary. By understanding the key components, features, and options available, you can make an informed decision that matches your space, budget, and golfing goals.
Remember these key takeaways:
- Space Assessment: Accurately measure your available area before purchasing
- Quality Priorities: Invest in the best impact screen possible, even if other components are more basic
- Future Planning: Consider how your needs might evolve and choose adaptable systems
- Proper Installation: Follow manufacturer guidelines precisely during setup
- Regular Maintenance: Implement a care routine to maximize component lifespan
Whether you choose a budget-friendly DIY option or invest in a premium commercial-grade enclosure, your simulator will provide countless hours of practice, entertainment, and improvement opportunities regardless of weather or season.
FAQs About Golf Simulator Enclosures
❓ How much space do I need for a golf simulator enclosure?
✅ Most standard golf simulator enclosures require a minimum room dimension of 10' width × 8' height × 15' depth (including hitting area). Compact options start at 8' × 8' × 12', while premium setups perform best with 12'+ width, 9'+ height, and 18'+ total depth. The exact requirements depend on your height, swing type, and the specific enclosure model...
❓ What's the difference between golf nets and simulator enclosures?
✅ Golf nets primarily catch balls and offer minimal side protection, while simulator enclosures provide complete containment with impact screens for projection. Enclosures typically include frame systems, proper mounting hardware, side/ceiling protection, and projection surfaces designed for simulator use. Nets cost $50-$300 and handle basic practice, while enclosures range from $500-$5000+ and create immersive simulation environments...
❓ How long do golf simulator enclosure impact screens last?
✅ Quality golf simulator impact screens typically last between 5,000-30,000 ball strikes depending on material, ball speed, and maintenance practices. Entry-level screens ($300-$500) usually handle 5,000-7,000 impacts before showing wear, mid-range screens ($500-$1,000) last 7,000-15,000 strikes, and premium screens ($1,000+) can withstand 15,000-30,000+ impacts. Regular maintenance and cleaning can extend screen life by up to 40%...
❓ Can I build my own DIY golf simulator enclosure?
✅ Yes, DIY golf simulator enclosures are popular and cost-effective options. Materials typically include PVC pipe or EMT conduit for the frame ($100-$200), impact screen material ($300-$700), side netting ($100-$300), and mounting hardware ($50-$150). Total DIY costs range from $550-$1,350 compared to $1,000-$3,000 for comparable pre-made units. The process requires basic tools, 4-8 hours of assembly time, and careful planning for proper dimensions...
❓ What's the best material for golf simulator impact screens?
✅ Premium golf simulator impact screens typically use multi-layer polyester or woven materials with specialized coatings. Top materials include Carl's Premium Projector Screen (good budget option), Impact Mesh (excellent durability), and Ultra White (superior projection quality). The best screens feature 5+ layers with impact-absorbing middle layers, minimal bounce-back technology, and UV-resistant treatments. Materials should balance durability, projection quality, and sound dampening for optimal performance...
Recommended for You:
- 10 Best Golf Simulator Screen Options For Ultimate Home Setup in 2025
- Best Golf Launch Monitor: Ultimate Guide to Improving Your Game in 2025
- 7 Essential Fiberbuilt Golf Mat Benefits That Will Transform Your Game in 2025
Disclaimer: This article contains affiliate links. If you purchase products through these links, we may earn a small commission at no additional cost to you.
✨ Found this helpful? Share it with your friends!